
How to Install Peel and Stick Wallpaper
Installing peel and stick wallpaper is a straightforward process that can transform your space in no time. With proper preparation and care, your walls will look stunning. Follow this detailed guide to achieve professional results.
You may need some of the following tools:

BEFORE YOU BEGIN
In the unlikely event of an error, this will help prevent installing panels in the wrong order. If an error is noticed, please contact us as soon as possible. Once the backing is removed from the peel and stick paper, that panel is no longer eligible for return or exchange.
When inspecting your walls, check the alignment where your walls meet to the ceilings and baseboards. These areas aren’t always straight and DO NOT make a good reference point for installation.
Inspect Your Panels
Panels are numbered and should be hung in order, starting from left to right. Lay them out on the floor and check that the patterns align correctly. If there are no numbers, the panels can go in any order since they are identical to each other.
Peel and Stick Wallpaper has an overlap! This means if you try to line the panels up seam to seam, the WILL NOT LINE UP! There is a slight overlap on the left and right of each panel to accommodate for the vinyl stretching due to humidity.
Prepare Your Surface
Ensure walls are clean, dry, and smooth. Use a gentle all-purpose cleaner to remove dirt and grease. Allow the surface to dry completely. Newly painted walls should cure for at least 30 days before applying wallpaper. Remove outlet covers, switch plates, and fixtures.
Textured, bumpy, or freshly painted walls can affect adhesion. If your wall isn’t smooth, consider lightly sanding rough spots and wiping away dust with a damp cloth.
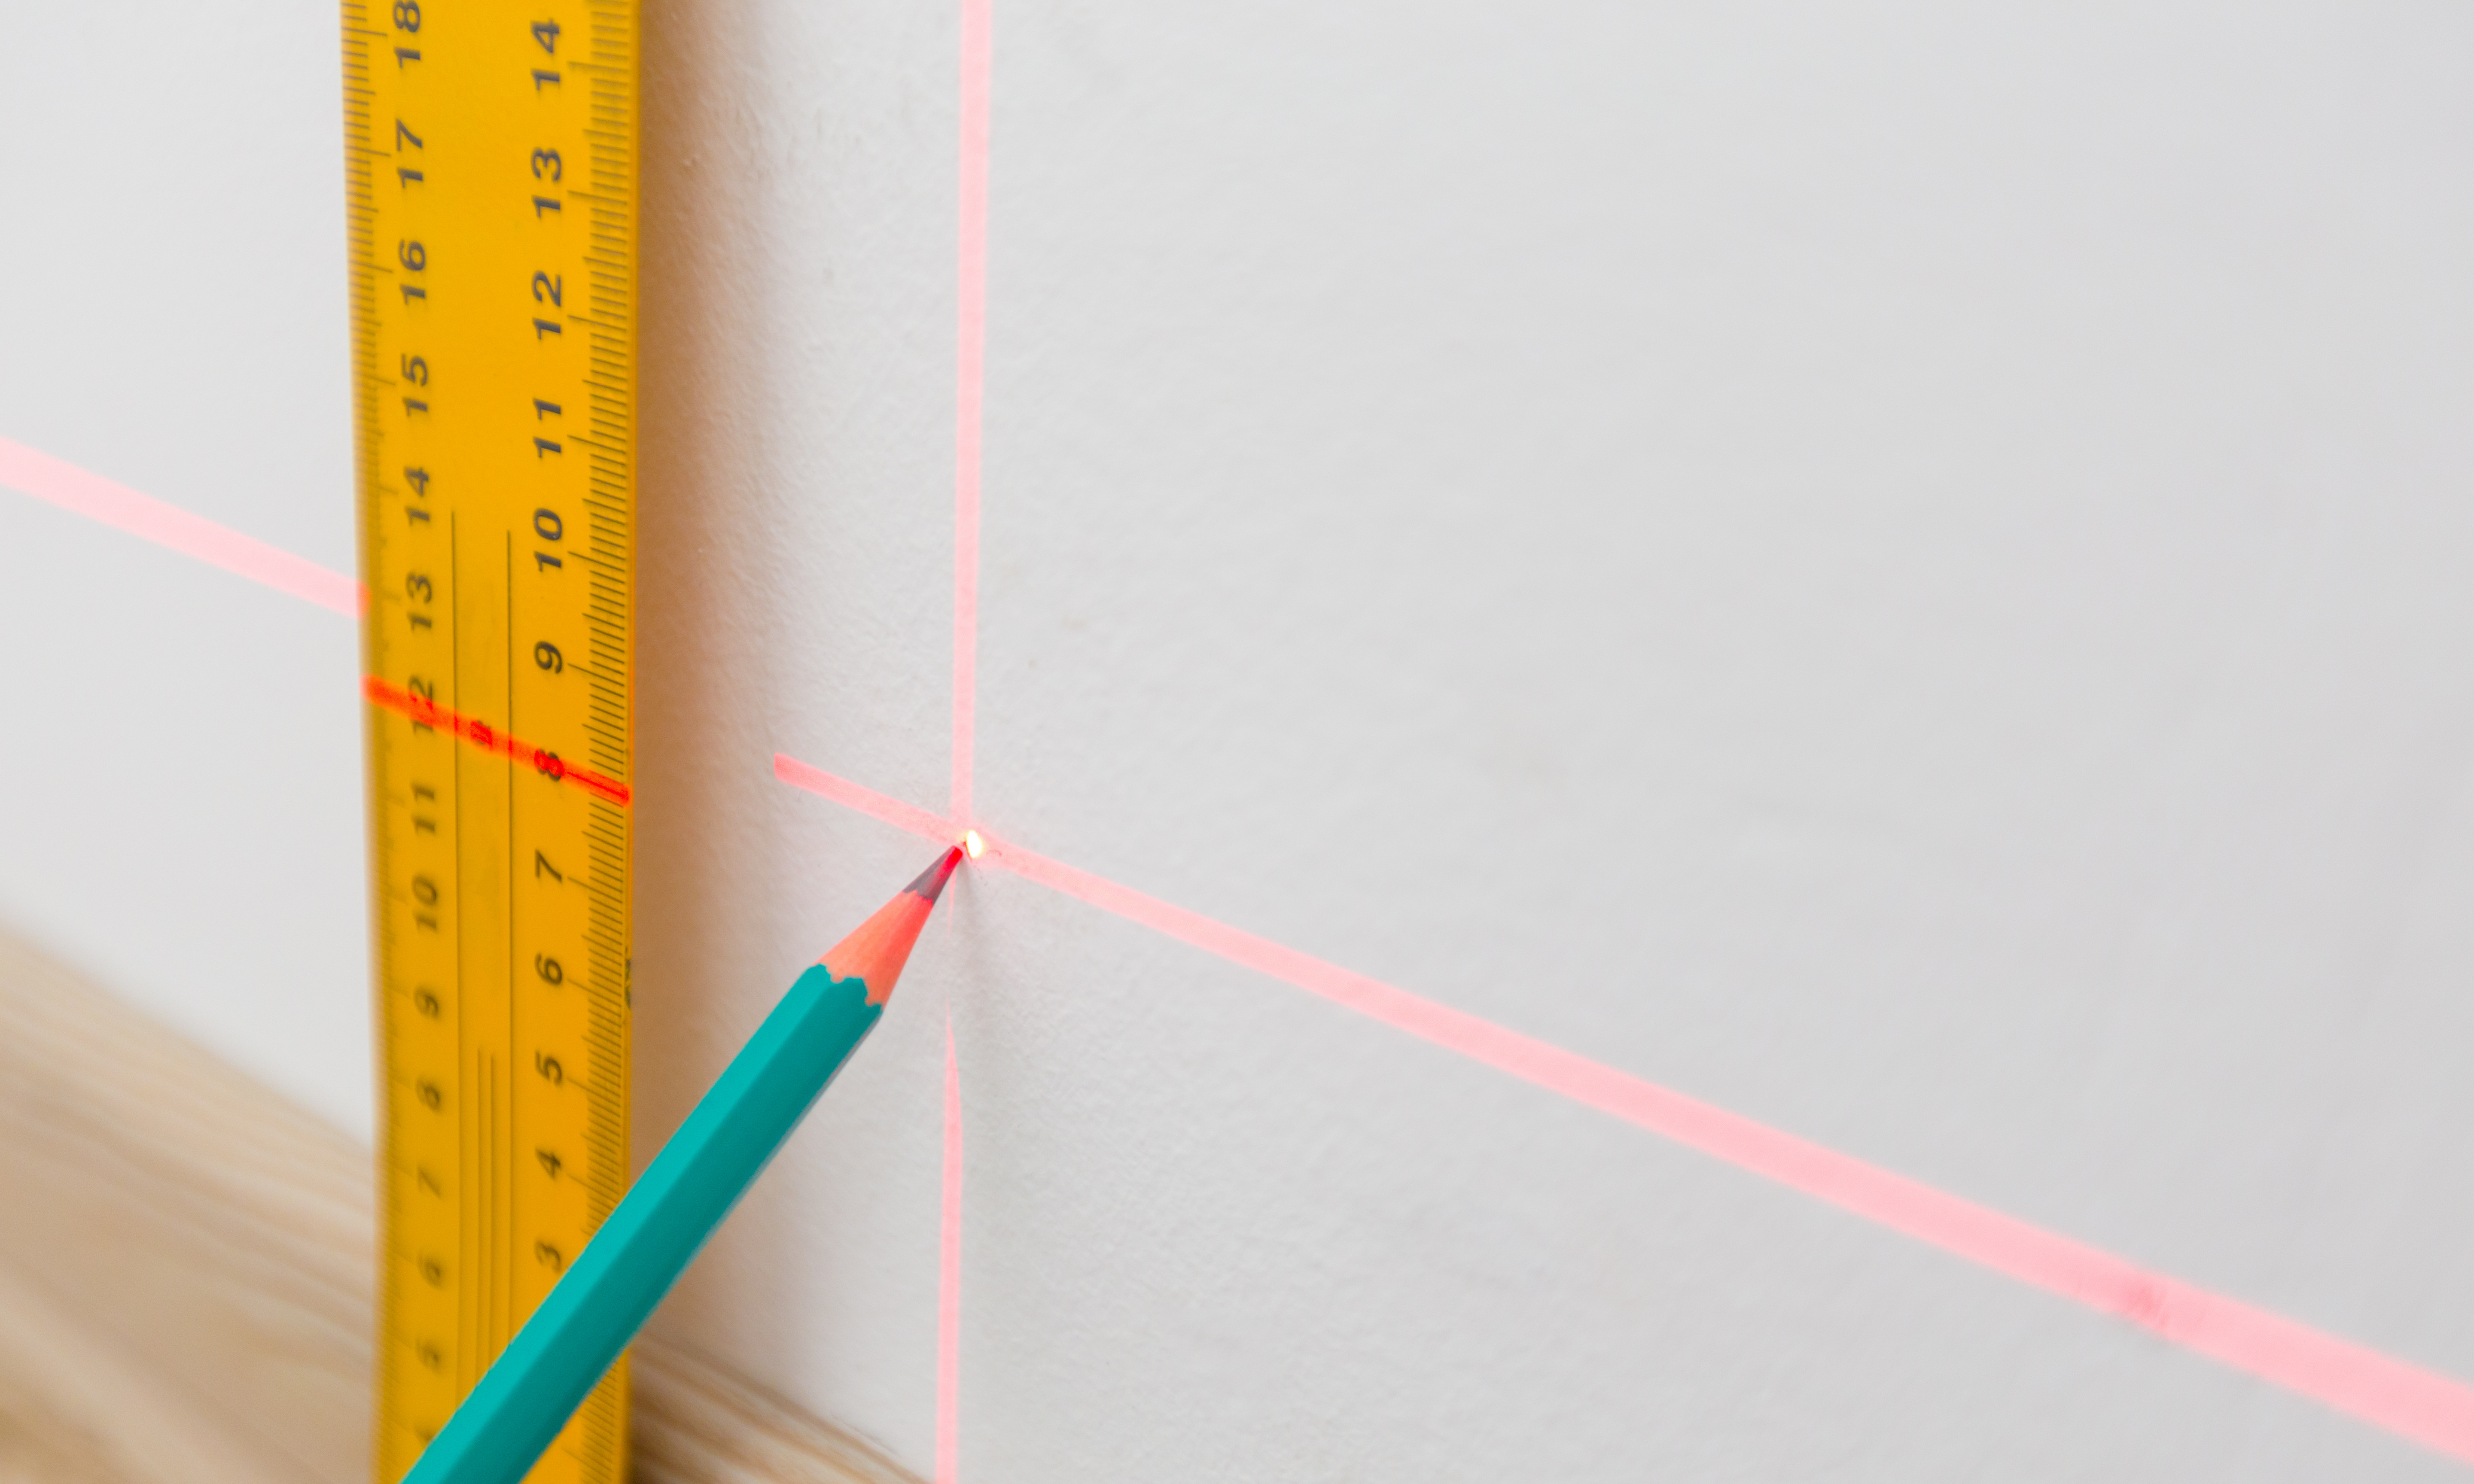
Step 1 - Measure and Mark Your Wall
Starting at the left side of the wall, measure and mark a vertical guideline at 23 inches using a pencil and your choice of level. This ensures your first panel is perfectly straight, which is critical for aligning subsequent panels.
Never assume your corners are perfectly straight! Even newer builds have misaligned walls. If you use them as a reference point they are slightly off, your panels will NOT align properly and the pattern will NOT line up correctly.
Step 2 - Align and Prepare the First Panel
Check that the first panel aligns with your guideline before peeling the backing.
Trim the top and bottom of the panel slightly if necessary for easier handling. Ensure to leave 1-2 inches of excess wallpaper on the top and bottom for adjustments.

Step 3 - Peel and Stick
Begin peeling the backing off the top 12 inches of the panel. Align the right edge of the panel with the vertical guideline, ensuring it overlaps the ceiling by at least 1-2 inches to accommodate any unevenness where the wall and ceiling meet.
Smooth the top of the panel onto the wall lightly to hold it in place.

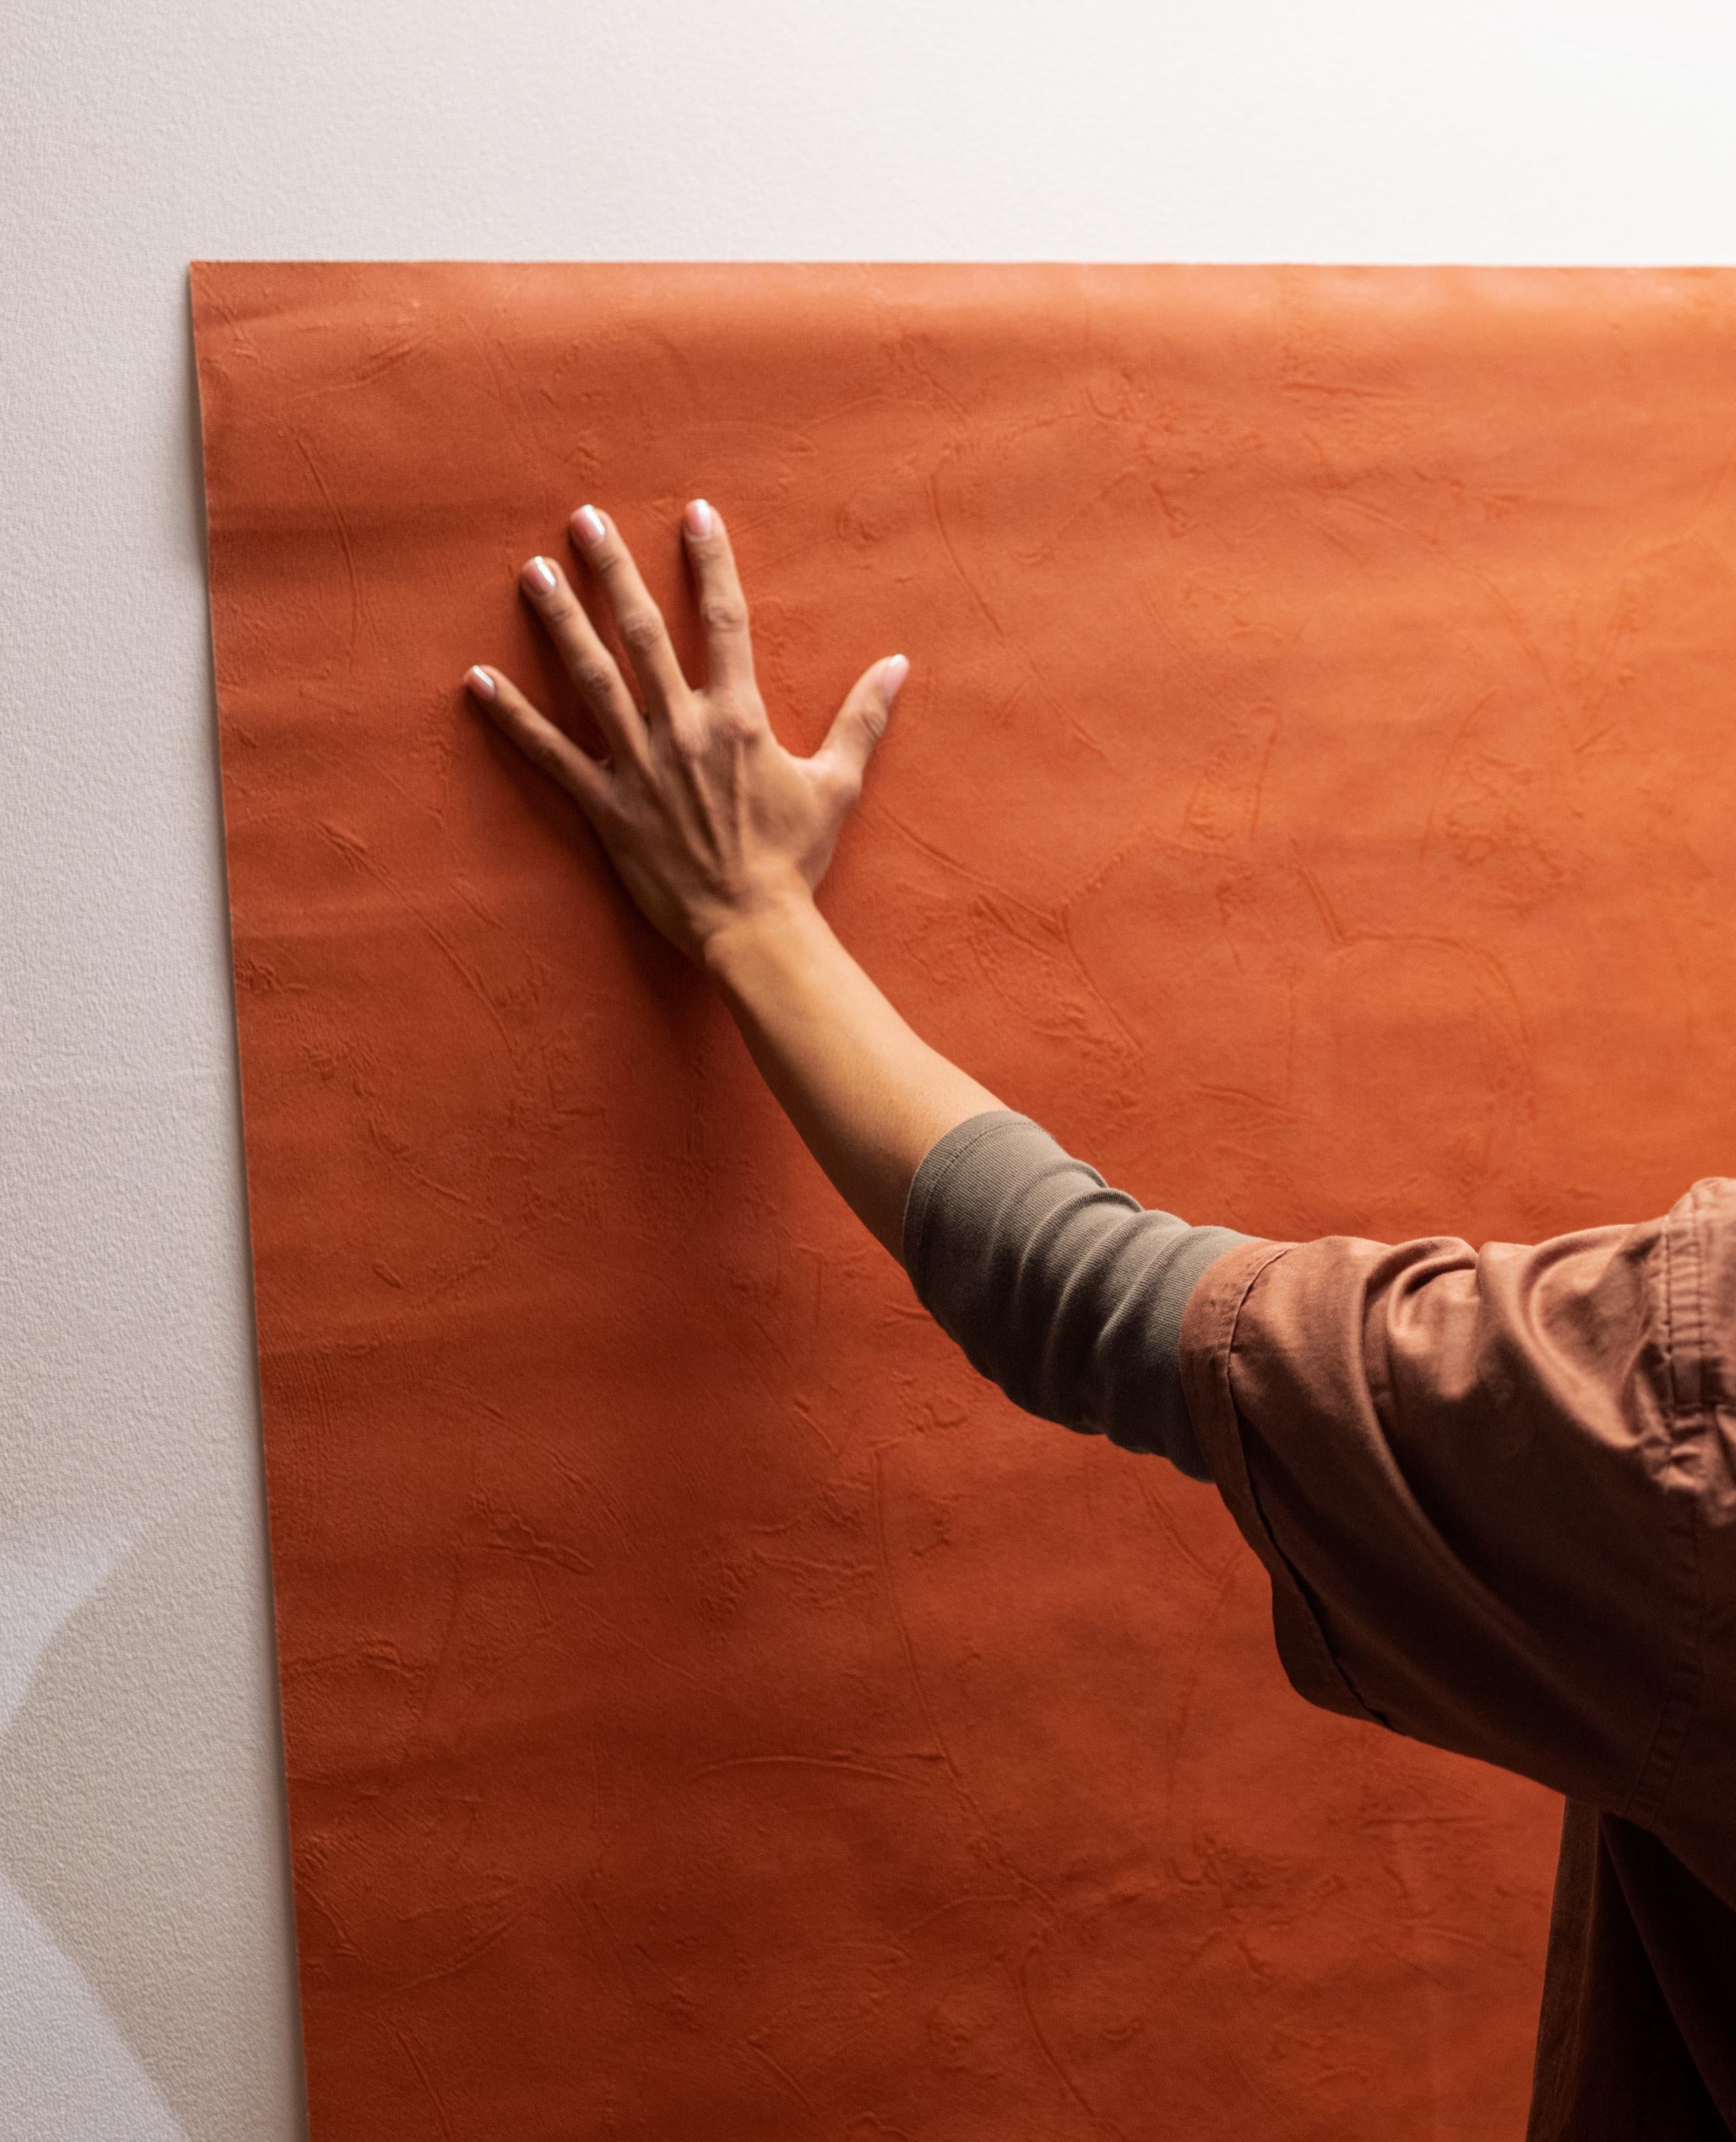
Step 4 - Smooth and Adjust
Gradually peel off more backing, working from top to bottom. Smooth the panel onto the wall using the plastic squeegee in a back-and-forth motion, pushing out air bubbles. Be sure to follow the guideline as you apply pressure.
Avoid stretching the material as this can distort the pattern.

Step 5 - Align Subsequent Panels
Match the pattern of the next panel with the one already applied. Check the alignment before sticking the panel to the wall.
Repeat the same peeling and smoothing process, ensuring that the edges line up perfectly. Use a helper if needed for long panels. One person can guide the top while the other smooths the bottom.

Step 6 - Ensure Panels Are Level
Continuously check that each panel is level as you proceed. A minor misalignment in one panel can affect the rest of the wall.
If the panel is crooked, gently peel it back and reposition it before smoothing it down again.

Step 7 - Repeat for Remaining Panels
Continue aligning and applying panels from left to right, following the numbering sequence. Always confirm pattern alignment before sticking.

Step 8 - Trim Excess Wallpaper
Once all panels are fully applied, use a razor knife and straightedge to trim excess material along the ceiling, baseboards, and edges.
Press down the trimmed edges firmly to ensure a clean finish.
With these detailed instructions,
You can confidently install your peel and stick wallpaper for a stunning and seamless finish!
Tips for Best Results
• Work slowly and take your time to ensure proper alignment.
• If you make a mistake, peel the panel back gently and reposition it. Peel and stick wallpaper is removable and repositionable.
• For textured walls, high-tack adhesive wallpaper is strongly recommended for better adhesion.
• For heavily textured walls, applying a skim coat followed by a coat of primer is highly recommended. Alternatively, a power sander can be used to smooth out any bumps.
Working with a friend is always better than working alone!

Tag us on social media
Share Your Finished Project
@jamesandcolors